Girls Garden Retreat
I am sorry it has been so long since I have posted! I have put remodeling on hold for the summer. Recently I decided to start my remodeling again. Riight now I am remodeling the girls room. I will keep you posted on the step by step process!
Add texture to walls
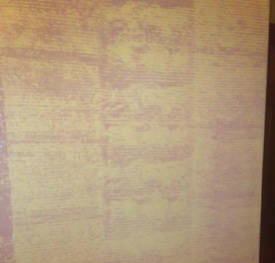
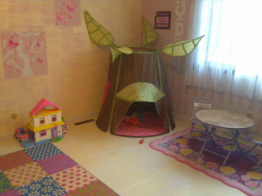
To start the girls room remodeling project I decided to add texture to the walls, give the walls a tree like look. I picked two walls acossed each other and used the cardboard roll on technique explained under the texture wall section. The walls were originally light yellow so I rolled light pink cardboard texture over it.
Add Accents with Paint
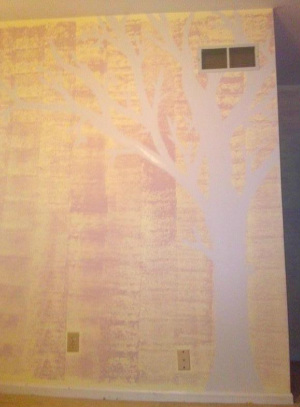
To give the room more of a forest/garden feel I decided to paint on a tree. I used a dusky white and a 1 " brush to free style paint on a tree.
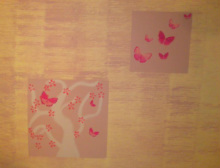
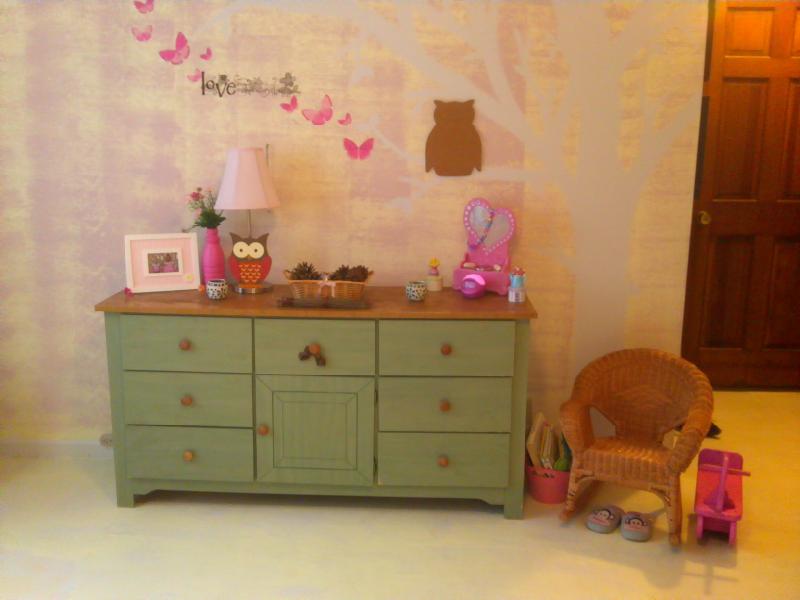
On the opposite wall I painted little pink squares with fun little murals. To add some extra character I used hot pink butterfly stickers.
Add Texture to Furniture
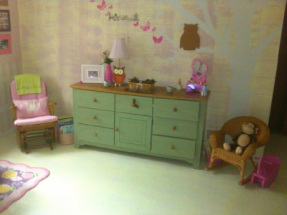
My girls had a dresser that I loved! It is perfect for the room except the top had water damage on the wood. I decided to brown paper the top so I could not only safe the dresser, but also add some texture and character! I used the same brown paper technique as I did the brown paper flooring.
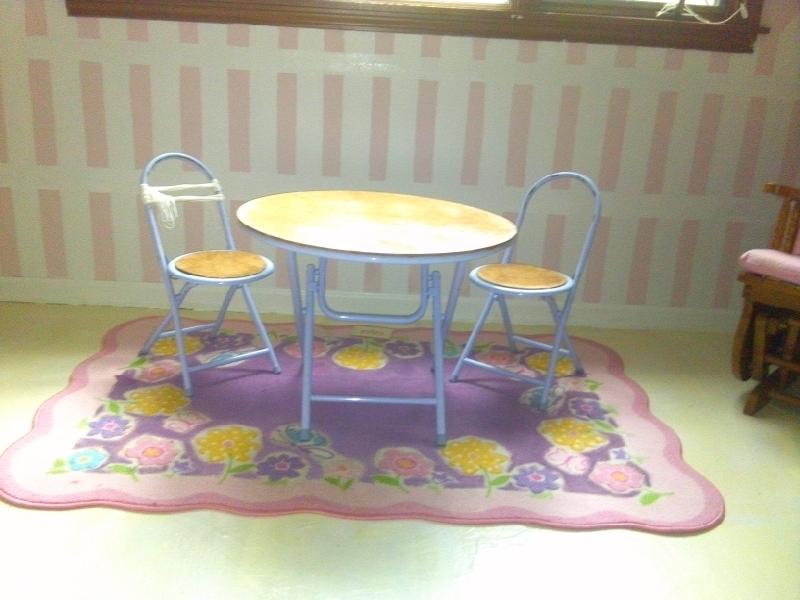
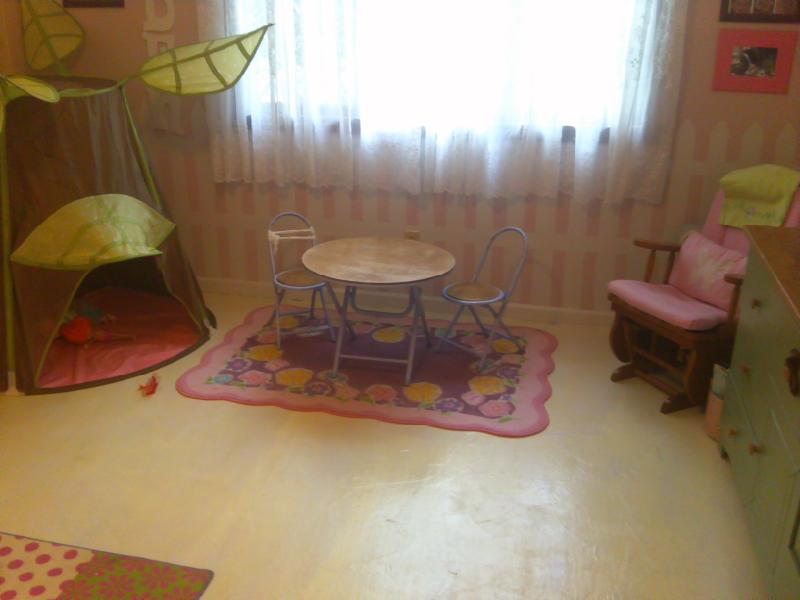
To continue the theme I decided to brown paper the girls Tinkerbell table, too. The table top and the chairs had markers all over it. So, I unscrewed the table top and seat part of the chairs and tore off the old cover and recovered with brown paper technique.
Add Color to Brown Paper Floor
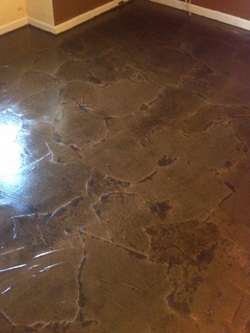
I originally planned to re-carpet the girls, but once I went to the carpet store I became completely overwhelmed. The girls are still young and are not very easy on carpet! So I decided to brown paper their room and try adding some color to make it unique. So I followed the brown paper technique. Instead of staining the paper I used pale yellow paint. After the yellow dried I decided add a little white paint to make more of a contrast. I put a little white paint n my hand and rubbed it across the floor so the creases would pick up the white. Then I just added 3 layers of poly, and we have colored brown paper flooring.
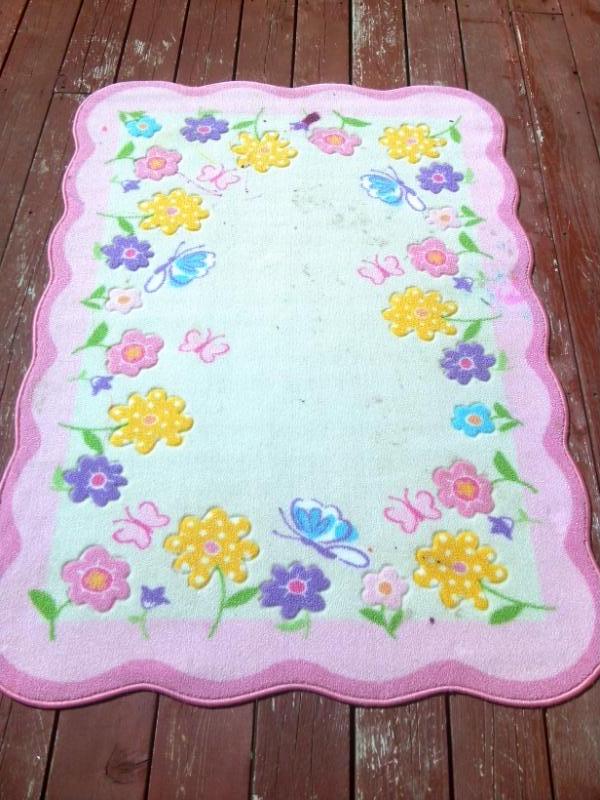
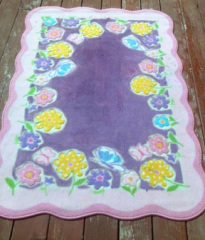
Restore a rug with a little bit of stain
The girls had a floral rug in their room that was more than just a little stained. I really thought it matched the garden theme. So, I decided to try to add a little stain to the white part of the run to cover the stains. I bought purple stain from Lowes and painted the stain over the white part. Check out this chicly cheap rug!
 |  |
Girls Garden Retreat
  |  |
The Sleek Master Suite
After remodeling the girls room I moved on to the master room.
Sleek Ebony Paper Flooring
First things first, the carpet has got to go! I decided to brown paper the floor. This time I decided to use ebony stain.
Furniture Restoration
After I completed the flooring I moved onto the furniture. I had a couple items that just needed updated it to give them a more sleek look.
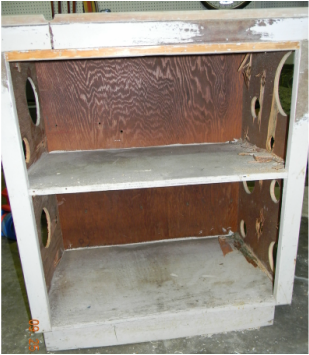
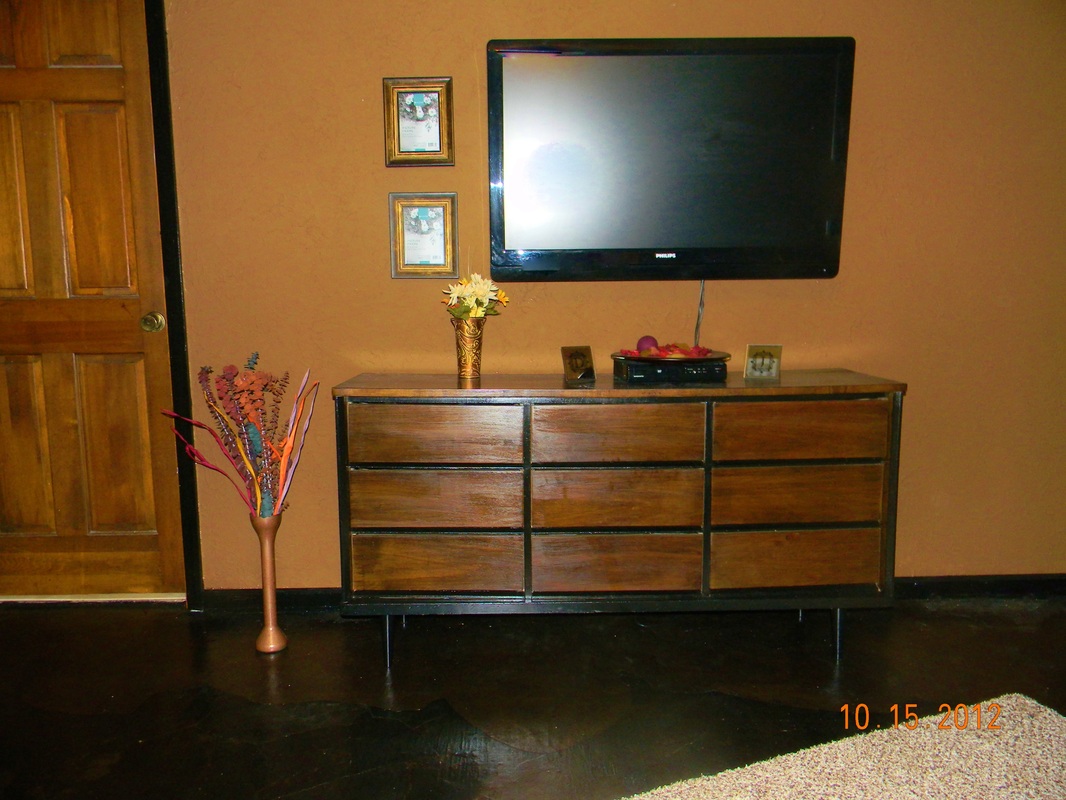
Modern Media Center
My husbands job requires him to be on call a lot, which means he needs his laptop accessible at all times. So I decised to add a media center to our room. We had this olf cabinet that was used out in the garage for tools, so there were a few holes cut in the side. I decided to go with it and make multiple hole on both sides of the table to make it look more contemporary.
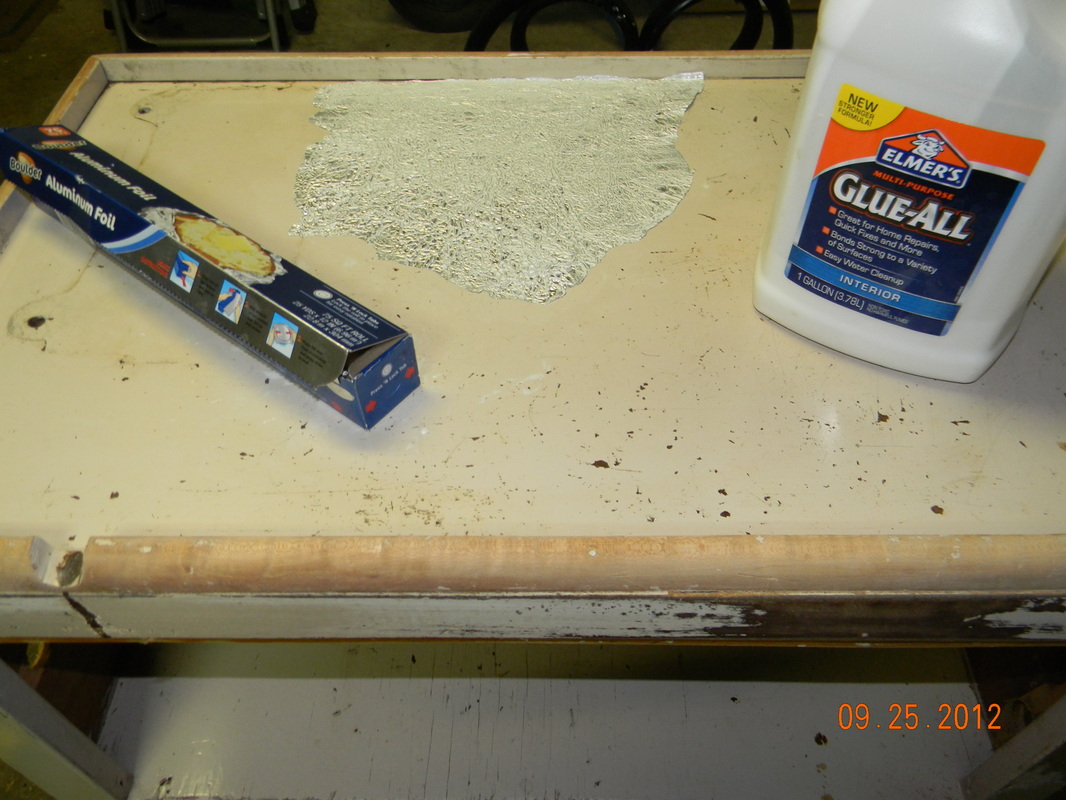
After sand and prepping the furniture it was time for the decorative touch. I decided to try to make a sleek reflective surface for the top of the furniture.
I took aluminum foil and a glue solution (1 part Elmer’s glue to 1 part water). Took the aluminum foil and crinkled it up. After straightening it back out i painted glue on the side and laid it on the top. I continued this process till the whole top was cover.
I took aluminum foil and a glue solution (1 part Elmer’s glue to 1 part water). Took the aluminum foil and crinkled it up. After straightening it back out i painted glue on the side and laid it on the top. I continued this process till the whole top was cover.
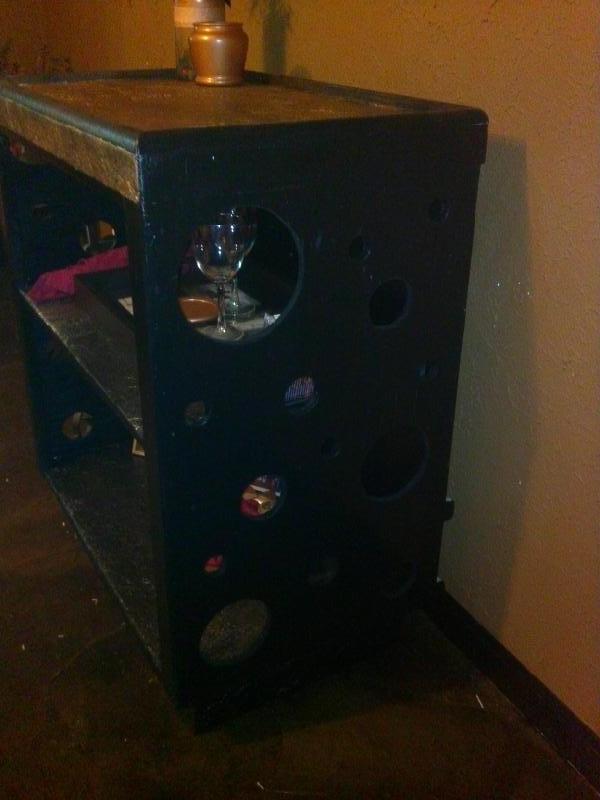
Then I painted the rest of the table black. When the foil top was dry I took ebony stain and smeared it across the foil to giveit an aged look, I then took copper spray paint and lightly sprayed it on the top and smeared it around. And then I was done, Check out my chicly cheap entertainment center!
 |  |
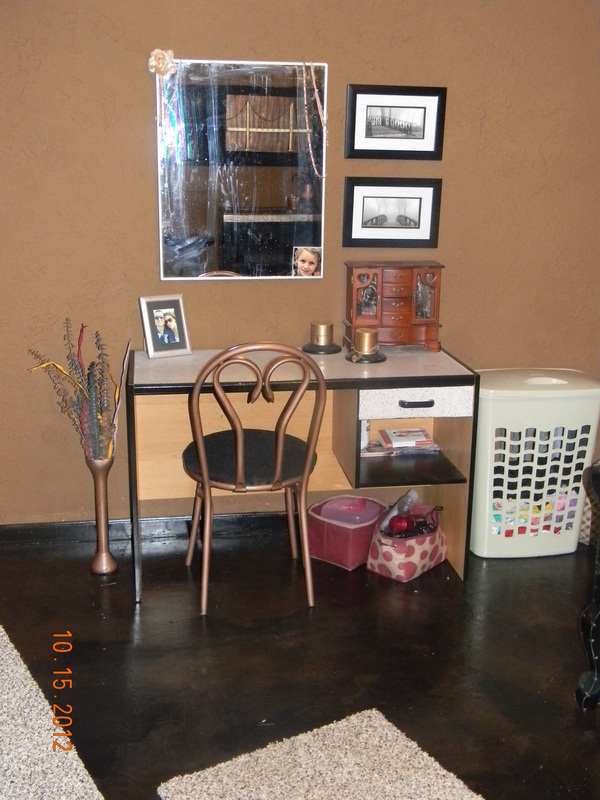
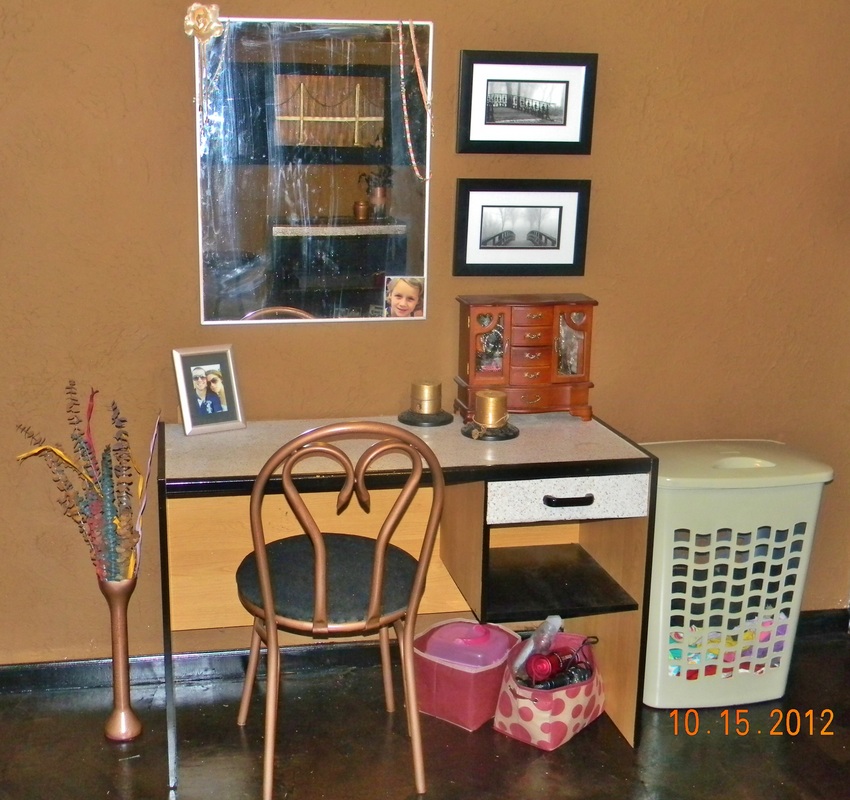
Vamp the Vanity
When we moved here there was a desk left behind. I decided to turn it into a vanity for the master room. To give the vanity a sleek look I painted the sides and front trim black. I used tac paper to add extra character to the top of the desk and the front of the desk drawer. Check out my chicly cheap vanity!
 |  |
Dress Up the Dresser
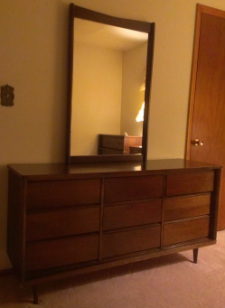
I found this beautiful older dresser that I knew would go perfect in this sleek new master suite. All it needed was a few finishing touches. I first painted the front frame around the drawers black. Then I took some back paint and lightly painted in on the tops and sides of the dresser, and used an old rag to smear the paint around. This gave the dresser a darker rich look. Finally, I painted the legs black. Check out my chicly cheap dresser!
Sleek Master Suite
Modern Room
Upstairs we have a spare room that we were restoring as a nursery because I was pregnant, but a few weeks ago I lost the baby. So right now it definitely has a nursery feel but we will see how it ends up.
Modern Grey Paper Flooring
Once again, the carpet had to go. I was going to carpet it so the baby had carpet to crawl on, but when I lost the baby I felt it was not as much a necessity. We decided to brown paper the room again. This time the stain was grey.
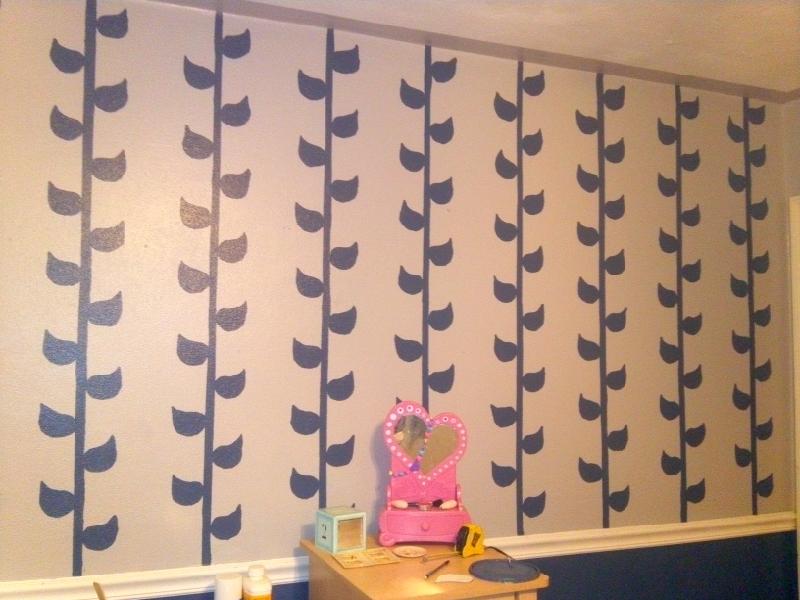
Accent Wall
Since we didn't know the sex of the baby we decided to do a neutral room, grey and navy. We figured we could accent with pink if it was a girl. I painted the top grey and the bottom navy. To add extra character I painted vines with leaves on it. I measured 3" and made a inch thick line. Then I cut out a leaf stencil to use. Every 3" up the vine I placed a leaf. i would pencil it on the wall and then go back and paint it navy.
Glitter Ceiling
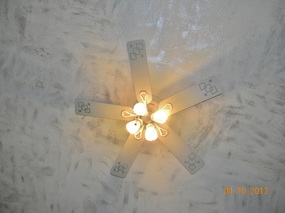
To add even more texture and sparkle to the room I decided to add glitter to the ceiling (see texturized walls section for step by step process).
Furniture Restoration
Glider
I took the glider that I used to have in my daughters nursery and stripped it down and painted grey. Added a layer of poly to add a little more protection. Then I took navy material to make a pillow. I used a grey material to make a stem similar to the one on the wall and sewed it on the front of the pillow.

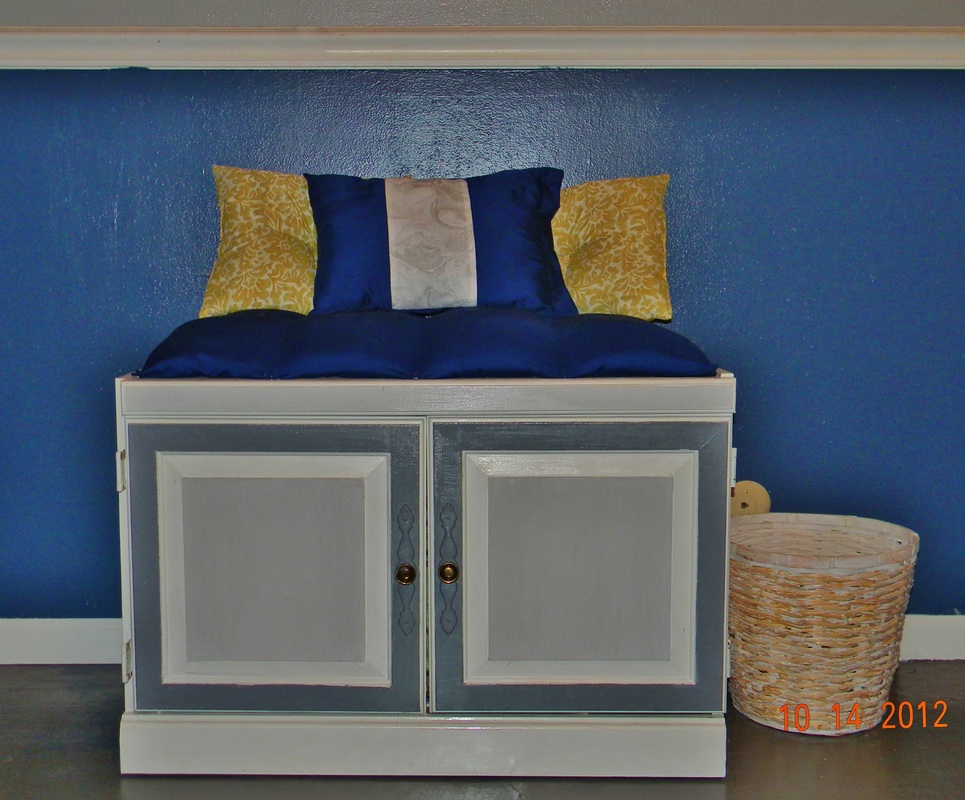
Bench
I took a old entertainment center and cut it down to just the two cabinets. Then I sanded it down and painted it grey and white. Then I took navy material and made a huge pillow. I decided to tac the pillow on the top of the bench. Check out my chicly cheap bench.
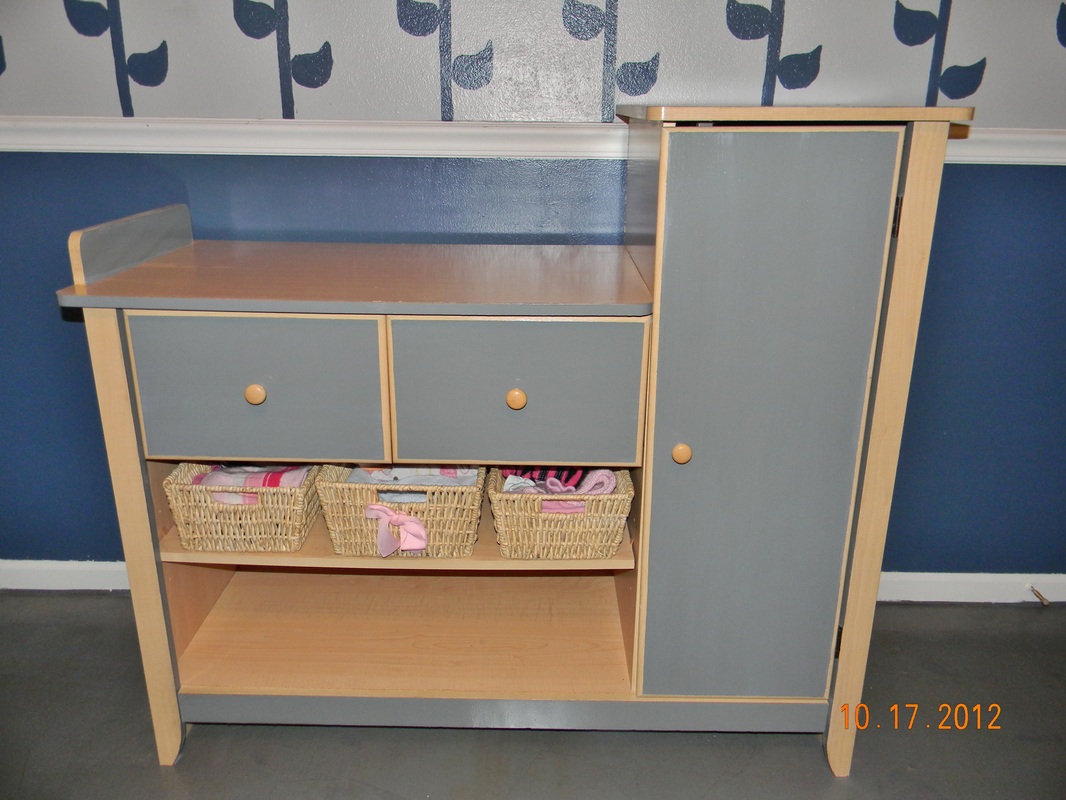
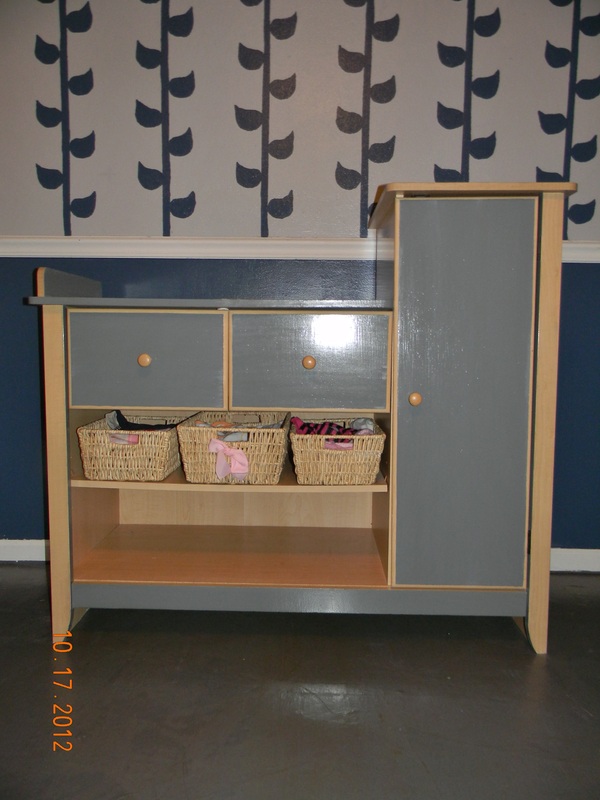
Changing Table
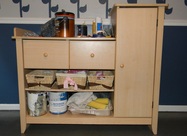
This changing table used to be my girls, so not only have I had it awhile, but also it has been used by two kids. As you can tell it has quite a bit of wear and tear. I decided to sand it down and paint grey accents to have if match the bedroom theme. After I painted I added a layer of poly. Check out my chicly cheap changing table.
 |  |
Crib
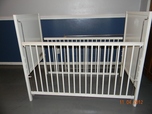
I found this crib for free on craigslist. Though very dated, I liked the overall shape of the crib. With a little bit sanding, painting, and adding poly you have a brand new modern crib! Check out my chicly cheap modern crib.
 RSS Feed